Nov 16, 2021 . 5 min read
Build a chrome extension that injects CSS into your favourite website

Recently, I got in touch with the chrome extension and decided to learn more about it. After reading some docs, I was amazed by how powerful chrome’s API provides as well as how simple it can be in building an extension using it.
In this article, I will be showing you how to create a chrome extension that can change your Google homepage background dynamically and will remain persistent.
Note that this article assumes some knowledge in HTML, JavaScript, and CSS as well as Linux-based operating system. For window users, please find similar commands that correspond to their Linux counterparts.
About extensions
What are Chrome extensions? Chrome extensions are software programs, built on web technologies (such as HTML, CSS, and JavaScript) that enable users to customize the Chrome browsing experience.
What can extensions do? Extensions are powerful tools that add features and functions to a browser.
However, extensions can only use either page actions or browser actions but not both.
Page actions are for actions that are only relevant to particular pages. It is seen in the chrome’s address bar.
Browser actions are by default enabled on all tabs/URLs. Similarly, it is seen in the chrome’s address bar.
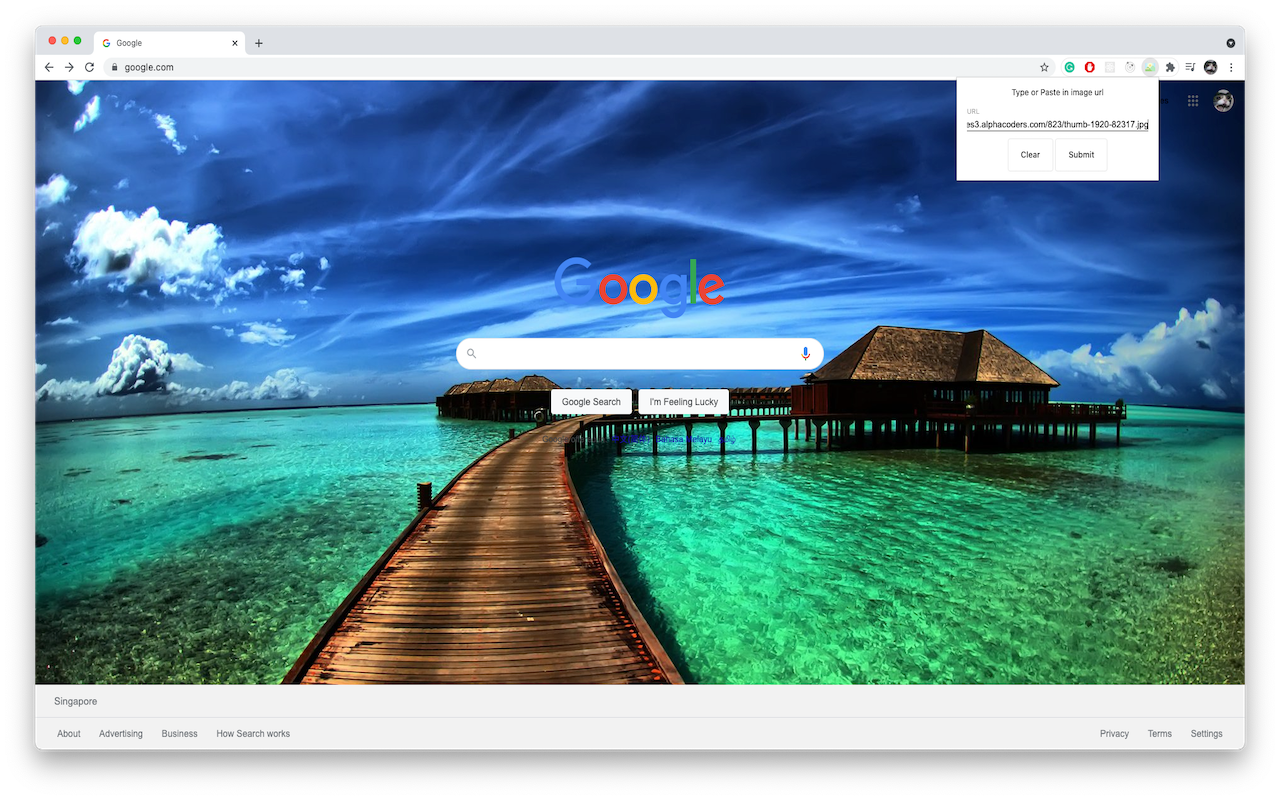
The extension we will be building in this article is a simple example that I have built. It allows users to dynamically change their chrome’s background image and remain persistent. Here is a gif of the extension:

Let's get started!
STEP 1
Create a new directory
mkdir chromebg
STEP 2
Create a new manifest file
Access the folder and create a manifest.json file
cd chromebg
touch manifest.json
The manifest.json file contains information about the extension’s name, description, permissions, version number, etc. Note that every extension requires this manifest.json file
In this project, we will require these 5 permissions.
- storage: To store the saved URL of the background image.
- notifications: To notify the user that the background is saved and changed successfully
- webNavigation: As the injected CSS which was previously present will be “lost” upon loading a new webpage, hence this API allows us to detect a change in page and calls for a new injection of CSS.
- declarativeContent: To take actions depending on the content of a page, without requiring permission to read the page’s content.
- https://www.google.com/*: The defined URL that we are requesting to allow injection of CSS
STEP 3
Connecting to chrome
- Go to chrome://extensions in your browser
- Ensure that the Developer mode checkbox in the top right-hand corner is checked.
- Click Load unpacked and select your directory. In this case, it will be chromebg
- If the extension is not valid, an error message will be displayed. Correct it and try again. Otherwise, it is valid, it’ll be loaded up.

Every time you make changes to the code, you should press the reload button that is in the card of your extension in chrome://extensions
STEP 4
Create Popup.html
This is essentially the UI of our popup. We will focus on 3 things, the input, the clear button as well as the submit button
touch.html
popup.css is not shown here. You are free to design your own popup! (If you are interested in the popup.css, visit here)
STEP 5
Create Popup.js
touch popup.js
popup.js contains the logic for the popup to communicate with the content script as well as chrome’s storage (see below for implementation of content script).
- chrome.tabs.query: Gets all tabs that have the specified properties, or all tabs if no properties are specified. We pass in { active: true, currentWindow: true } in order to get the current window which is active.
- chrome.tabs.sendMessage: Sends a single message to the content script(s) in the specified tab, with an optional callback to run when a response is sent back. The runtime.onMessage event is fired in each content script running in the specified tab for the current extension. tabs[0].id represents the id of the active and current window and the 2nd params represent the object we are passing to that tab.
- chrome.storage.sync.set: stores a key-value mapping in chrome’s sync storage
- chrome.notifications.create: Creates a notification to the user that the background is saved and changed successfully. Note that the notification id is left as "" so that each time the user changes, the notification will be shown
STEP 6
Create Content Script
touch content.js
content.js contains the logic of communicating with the webpage as well as chrome’s storage. Also, it listens for action from popup.js in setting a new background, clearing of the background image, and changes of URL via background script. (see below for implementation of background script)
chrome.runtime.onMessage.addListener: Fires when a message is sent from either an extension process (by runtime.sendMessage) or a content script (by tabs.sendMessage).
Note that there is some repetition of code for ease of demonstration
STEP 7
Create Background Script
touch background.js
background.js contains the logic of sending messages to the content script whenever the URL changes.
For more information regarding the declarative content, please visit https://stackoverflow.com/questions/22511854/chrome-extension-that-acts-only-when-clicked-on-certain-webpages
STEP 8
Now go to chrome://extensions in your browser, click reload.
Go to https://www.google.com and click on your extension icon and insert an image URL for your background.
Voila!!!
That’s it! Our extension is now complete.
Conclusion
Now that we are done with our extension and is ready to be published, you will first need to create a chrome developer’s account. Please visit chrome’s developer guide for more information.
Check the repo for this project:
https://github.com/seanjyjy/chrome-bg
Visit here to download the extension.
All in all, in this article, we’ve learnt the basics of Chrome extensions by creating an extension using only HTML, JavaScript, and CSS. Hope that you find this article useful and let me know what you think in the comments!
View the Medium article here